Click on the image on enlarge.
Category Archives: CeCe Caldwell Paints
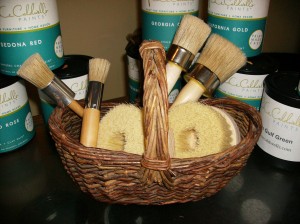
Wax Brushes Are Here!
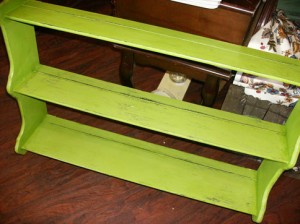
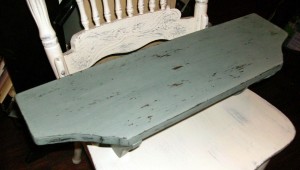
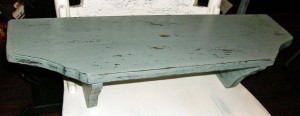
Before & After Wall Shelf ~ Spring Hill Green
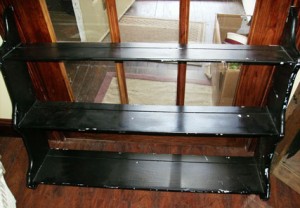
This is a big, ugly, black wall shelf with multiple layers of crappy paint on it.
So, I was in the mood for a happy, warm weather color and decided to test the Spring Hill Green. Now, you all know the drill – paint, distress, wax, buff. But, the interesting thing with this project is that after painting the shelf with two thin layers of paint (the paint was very slightly watered down), I decided to wax immediately after the second coat dried to test a theory. So, I did not do any distressing and immediately waxed. What happened is that while waxing, the shelf distressed itself! This gave it a sort of distressed, washed look. I think this is super neat for projects that don’t demand a definite look because you can kinda play around and just see what happens. Fun!
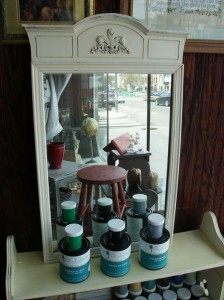
Mirror Using CeCe Caldwell’s Vintage White
This was just an old wood mirror – that a billion people have had over a dresser at one time or another.
I slapped on two coats of CeCe Caldwell’s Vintage White. Distressed. Applied clear wax. Buffed. DONE!
I’d love to make the directions more complicated … but that’s all there is with CeCe Caldwell’s Paints & Finishes.
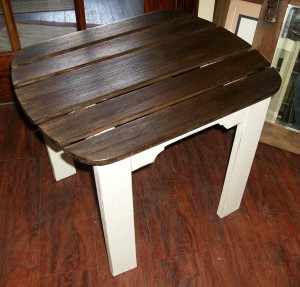
Upcycled Indoor/Outdoor End Table ~ Just Like Pottery Barn!
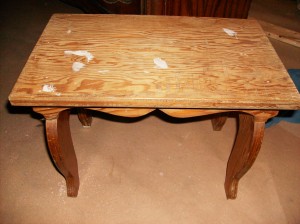
Note: Where the edges of brown look like they have smudged white paint on them – they don’t. Again, it’s because of my very sad photography skills.
OK … so, don’t kill me … but it looks like I forgot to take a “before” picture of this table. I could have sworn that I took a picture of it months ago when I first brought it into the store … so maybe the secret cyber picture thief took it. Either way, if I come across it I will post again with a before/after shot.
Moving on, this is table that I picked up at a yard sale last year and I immediately envisioned it fixed up and sitting in my yard, or on a porch or deck. The table is wood, but the wood was dried out and looked really sad and tired. I knew, if possible, I wanted the top of the table to have a natural wood look with the sides and legs painted white and distressed for that shabby chic/cottage style look.
First, I rubbed (using an old t-shirt) the top and underside of the table with hemp oil. It took about 2 coats to revive it because the table was really dehydrated, so it slurped it right up. It made the top look happy and perky!
Then I painted (two thin coats) the legs and sides using CeCe Caldwell’s Vintage White. Once the second coat dried I did some light distressing. As I usually do, I started with all of the edges. Once the edges were done, I decided that I liked the look as it was, so I left the distressing at that.
For a finish I used two different products. I used CeCe Caldwell’s Satin Finish on the top and underside – simply because I wanted those areas to cure a little faster since, more than likely, the top of the table will be heavily used. Then, I used CeCe Caldwell’s Clear Wax on the all of the area that was painted white. What ended up happening (which I really, really liked) is that the top had a little bit more of sheen to it, while the white parts of the table had a very muted sheen.
So, this my indoor/outdoor end table. Come on in to the store and check it out!
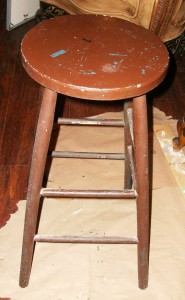
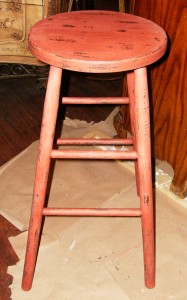
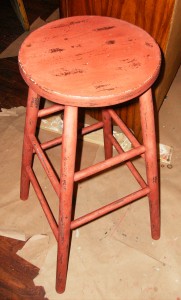
“Before & After” Stool Using CeCe Caldwell’s Paints ~ Color Sedona Red
Here are some “Before & After” pics of a stool that I painted yesterday using CeCe Caldwell’s Paints & Finishes. The color that I used is called Sedona Red. This was so simple, but I’ll explain what I did.
First, I couldn’t even tell you where I got this stool. It’s been in my basement, for like, forever.
Yes, the stool is ugly, but I always knew that it had potential! Now, you would think that I would tell you to clean the stool because, as I always say over and over, “you don’t know where it’s been or what it’s been used for” (get your minds out of the gutter!). In this case, the stool was already had several layers of paint on it – the top layer being a really ugly brown.
So, I literally just wiped it down with a paper towel – not even a damp one … just a dry paper towel. Sometimes I’m just impatient … not always a good quality, but I’m working on it.
Then, I just slapped on the paint. Seriously. I didn’t sand or prime or anything. I used one coat on the legs and two coats on the top. I waited for the first coat to dry before applying the second coat.
After both coats dried, I used a wet (but very, very well wrung out) piece of a t-shirt and rubbed where I wanted the distressed effect.
After this dried, I applied clear wax (really rubbing it in) and let it sit for about a half hour. Then, I took a dry, old (but clean) dishrag and rubbed, rubbed, rubbed until the wax took on a nice subtle shine.
This is the finished product.
Rainy Day Painting – Zen Time
So, while everybody on the planet (ok, so I’m exaggerating a little) is getting snow, here in Philly we are getting rain – again. It’s bad enough that I can’t control the weather, but in the past few days I can’t control my hair, either … rain = frizz.
So, while I’m here at the store – which has been pleasantly picking up through word of mouth – I’ve decided to paint. So, I’ll share what I’m up to.
I forgot to take a “before” picture of this shelf that I just finished, but here are the “after” pictures. I used CeCe Caldwell’s Chalk and Clay paint – the color is Smokey Mountain Gray. I simply slapped it on (literally) and let it dry – which took no time at all. I then distressed it using a damp cloth and let that dry. I lightly coated it with a water-downed layer of CeCe Caldwell’s Satin Finish and let that dry. Finally, I applied CeCe Caldwell’s Clear Wax (which I LOVE so much) and buffed it with a dry rag.
This whole process took me about 2 hours – INCLUDING drying time between all the steps! Sooo easy!! Here it is (and please remember that I am seriously shitty photographer, but I’m working on that):
Since, it’s so dreary here, I’m getting ready to work on a small stool that I got from who knows where …. knowing me, I probably “trash-picked” it. Either way, it’s gonna go from Ugly to Lovely in 2 hours. I’ll be sure to share the “After” … 🙂

